> ## Documentation Index
> Fetch the complete documentation index at: https://telr-docs.cashfree.com/llms.txt
> Use this file to discover all available pages before exploring further.
# Edit Vendor Details
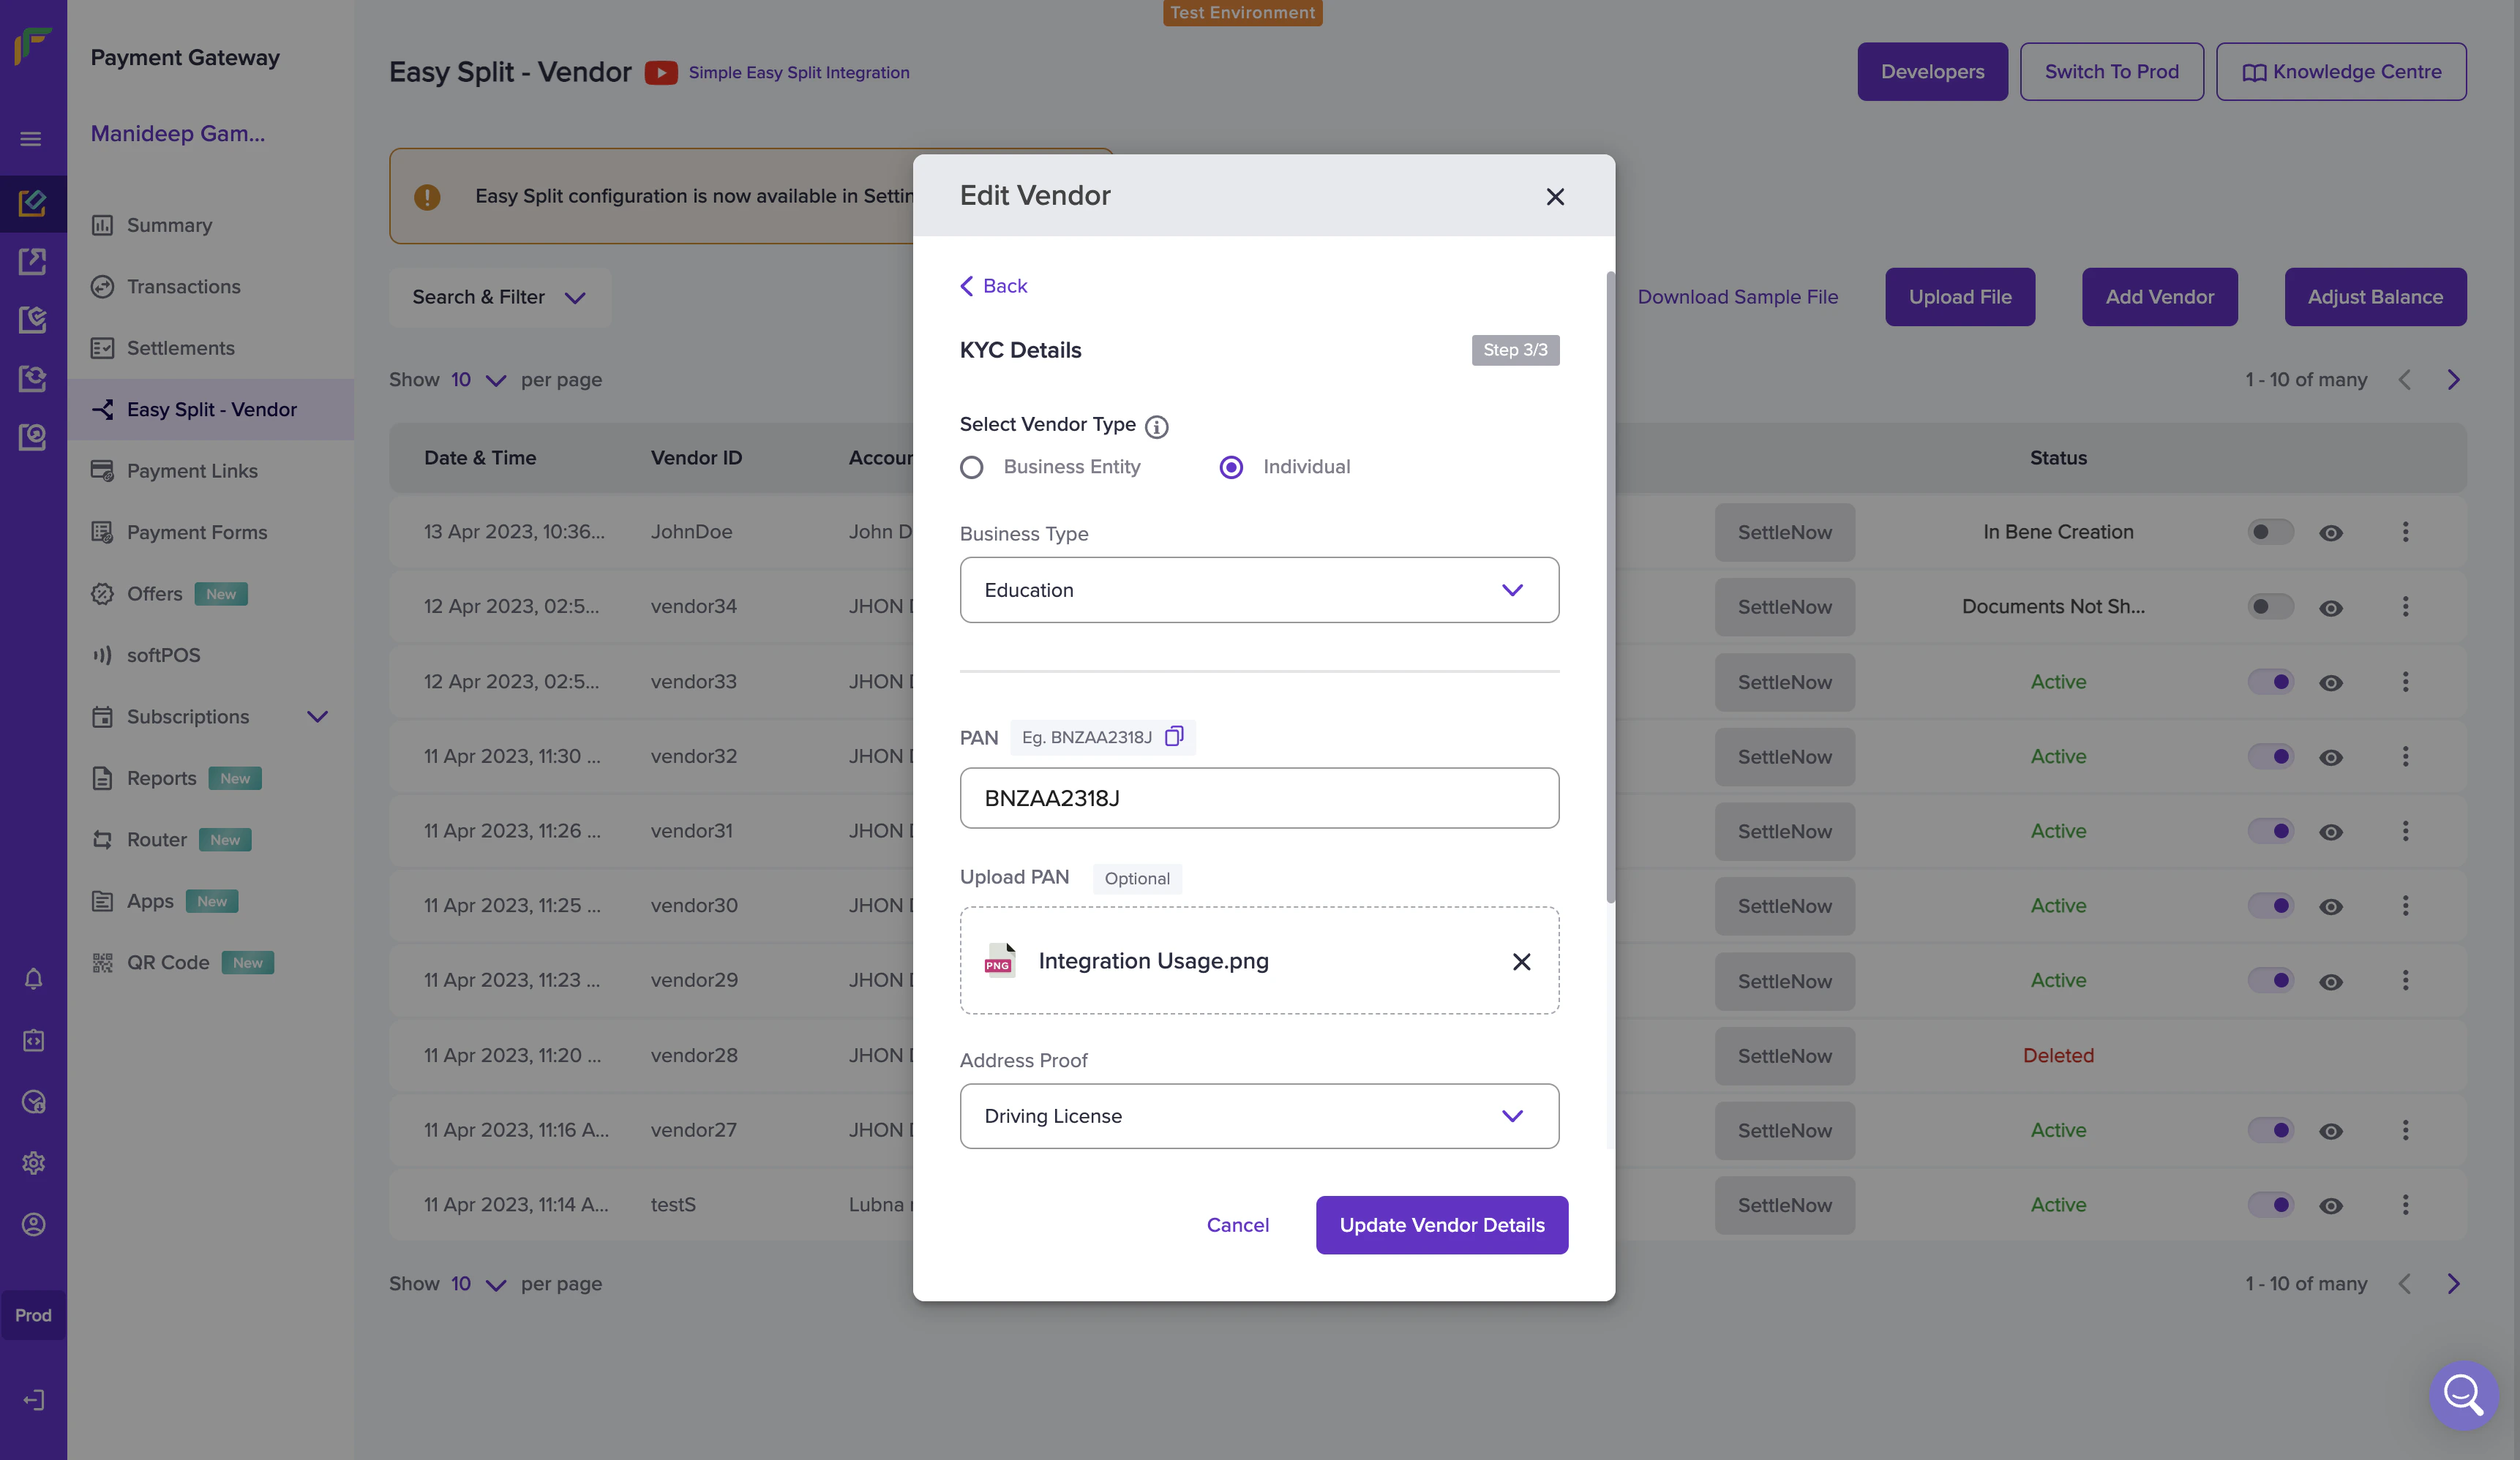
While adding vendors, if you have specified incorrectly vendor details or missed adding some information, you can modify it using the **Edit Vendor** feature on the product dashboard or use the [Update Vendor Details](/api-reference/payments/latest/split/vendors/update) API.
## Vendor Status
Once you have added a vendor, it will go through various stages. They are mentioned in the table below.
| Vendor Status | Description |
| :--------------------- | :---------------------------------------------------------------------------------------------------------------------------------------------------------------------------------------------------- |
| In Bank Validation | This status indicates that the bank account validation process have been initiated. |
| Bank Validation Failed | This status indicates that the bank validation has failed. Update bank account details to correct one. |
| In Bene Creation | This status indicates that the beneficiary creation is in process. During this process, we will add beneficiary accounts through our banking partner to process future transfers. |
| Bene Creation Failed | This status indicates that the beneficiary creation at the partner bank has failed. Update bank account details to retry new beneficiary creation. |
| Action Required | This status indicates that either one or multiple KYC documents has failed verification. Merchant should provide - correct/updated/relevant KYC documents to progress further with vendor onboarding. |
| Active | This status indicates that the vendor account is active. |
| On Hold | The On-hold status is updated by the Telr team. The onboarding team has put the account On-hold because either the document is not available or the documents shared are insufficient. |
| Blocked | This status indicates that your vendor account is blocked. You can later unblock if you intend to resume the vendor settlements. |
| Deleted | This account indicates that your vendor account is deleted. |
To edit the details of the vendor you have already added,
1. Go to **Payment Gateway Dashboard** > **Easy Split - Vendor**.
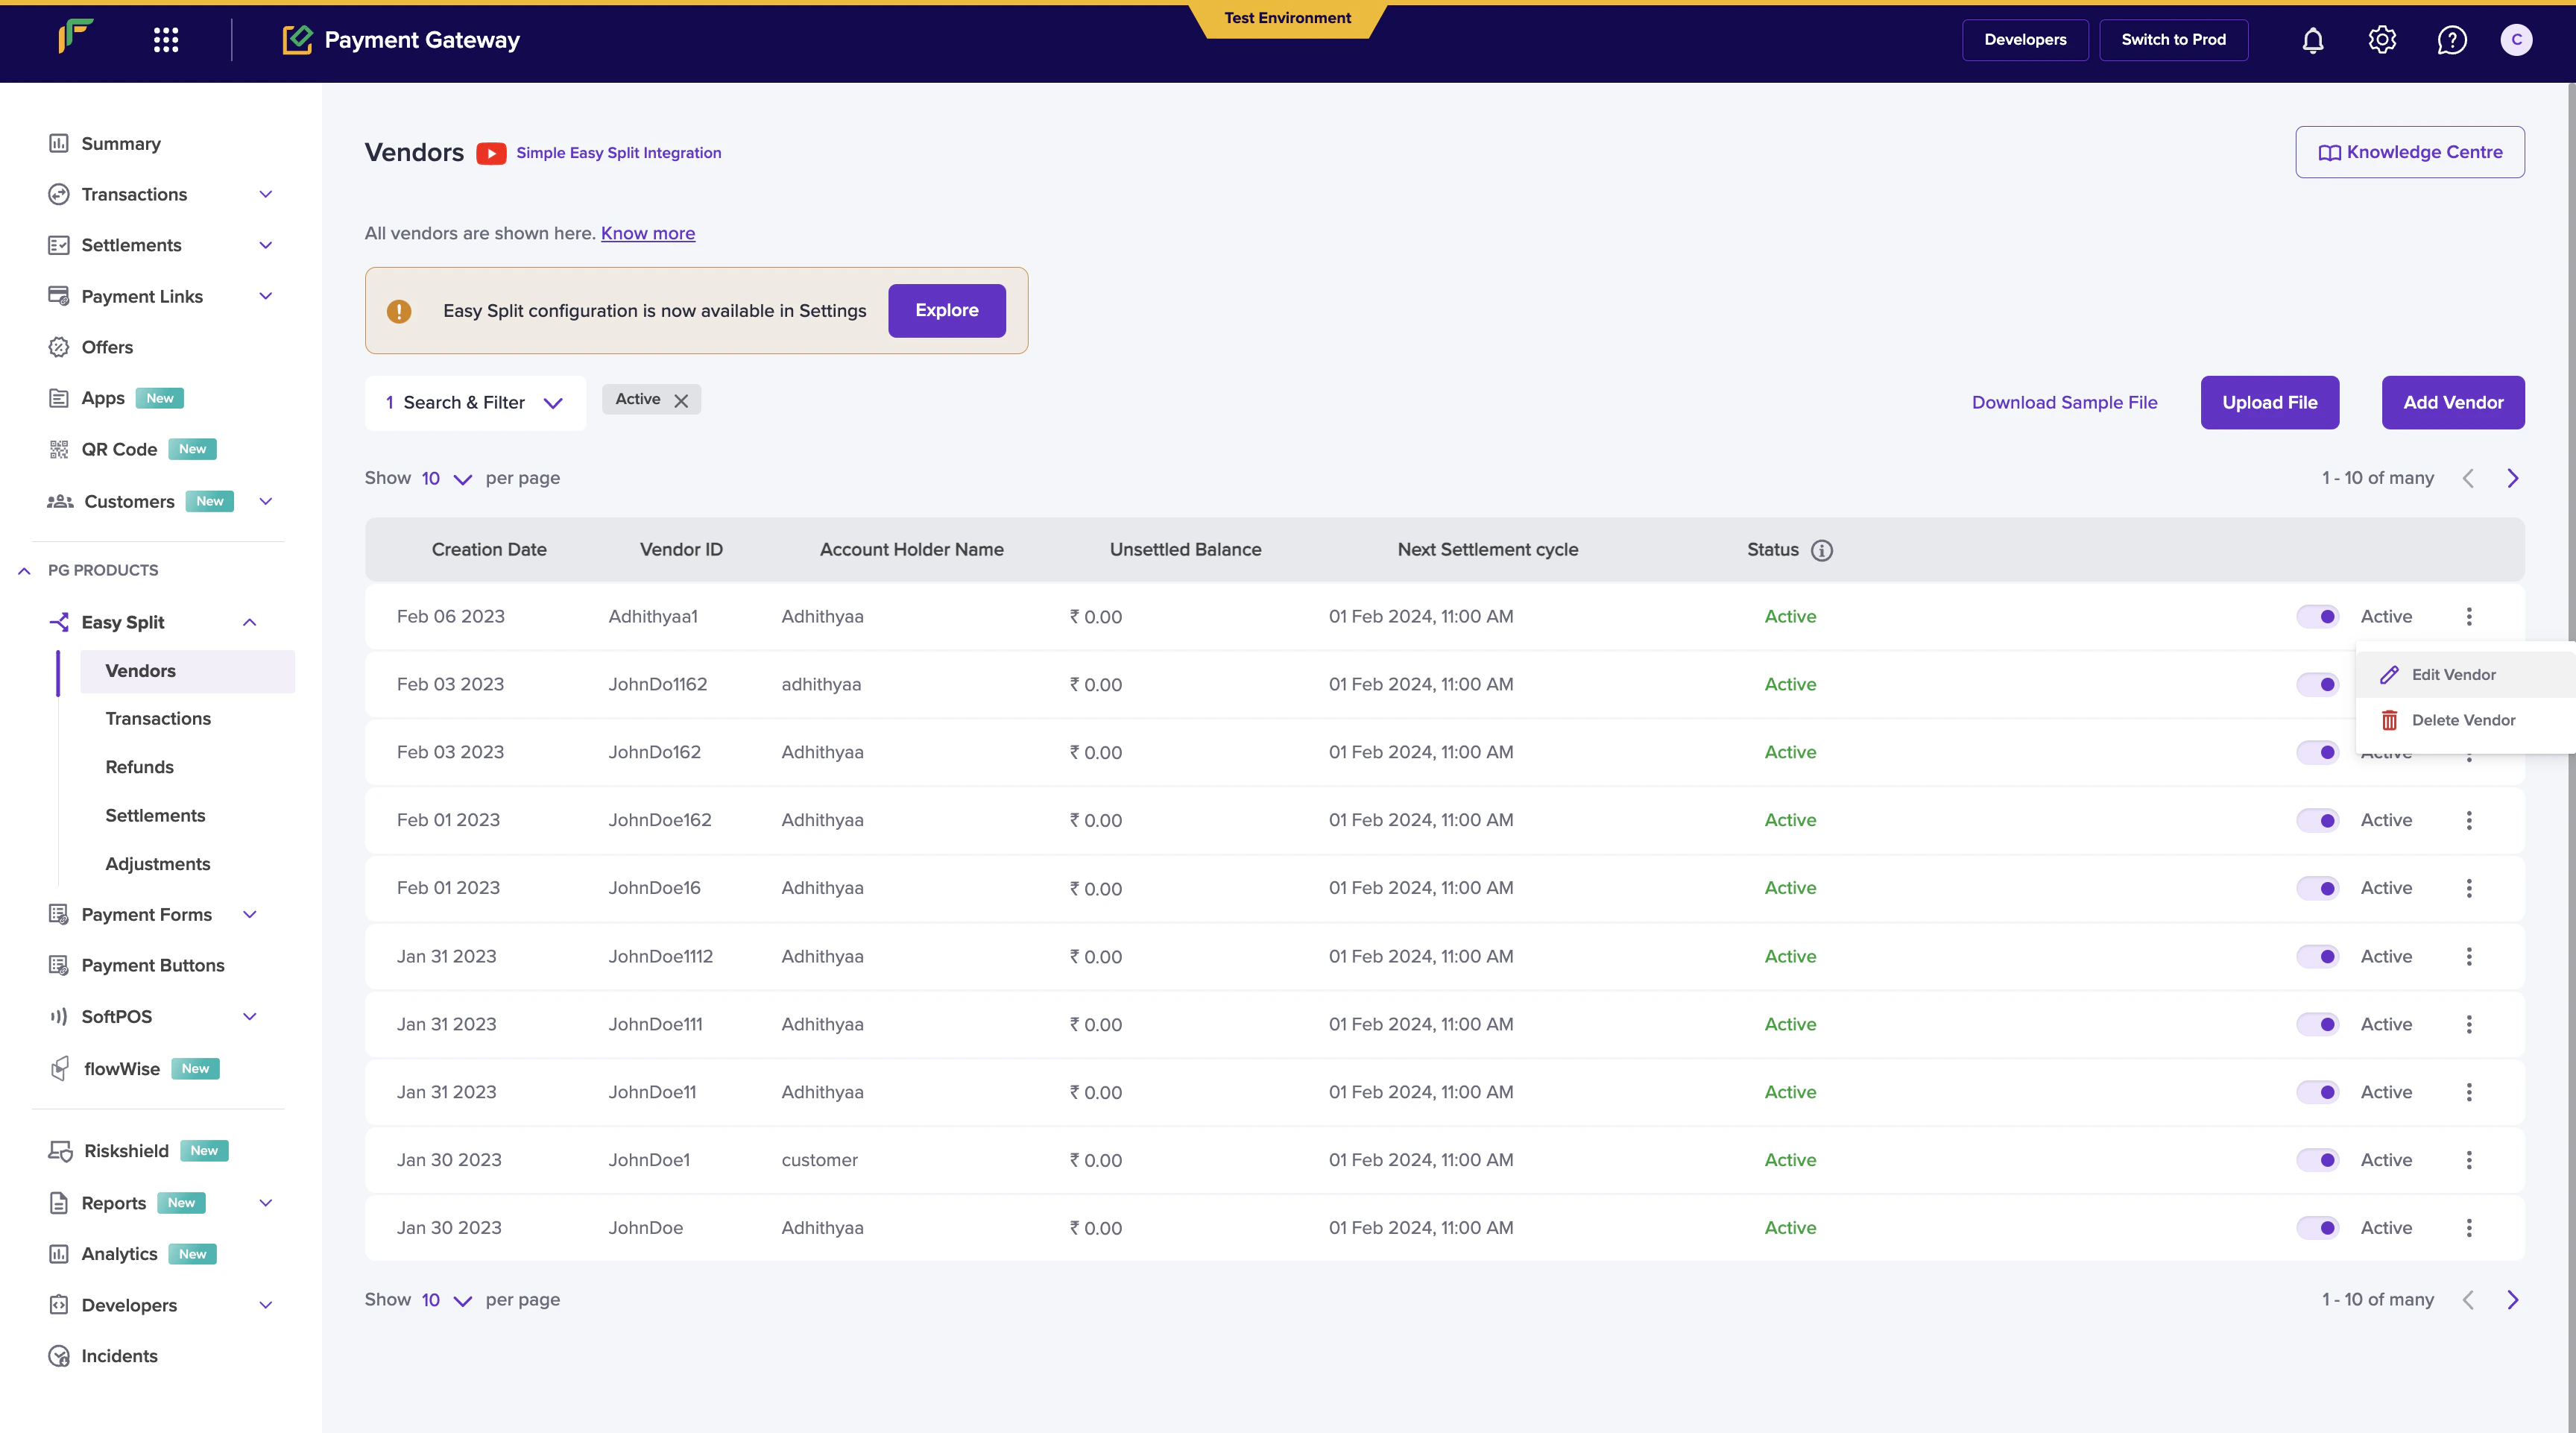
2. Click the ellipsis icon on the vendor you want to make changes to and select **Edit Vendor**.
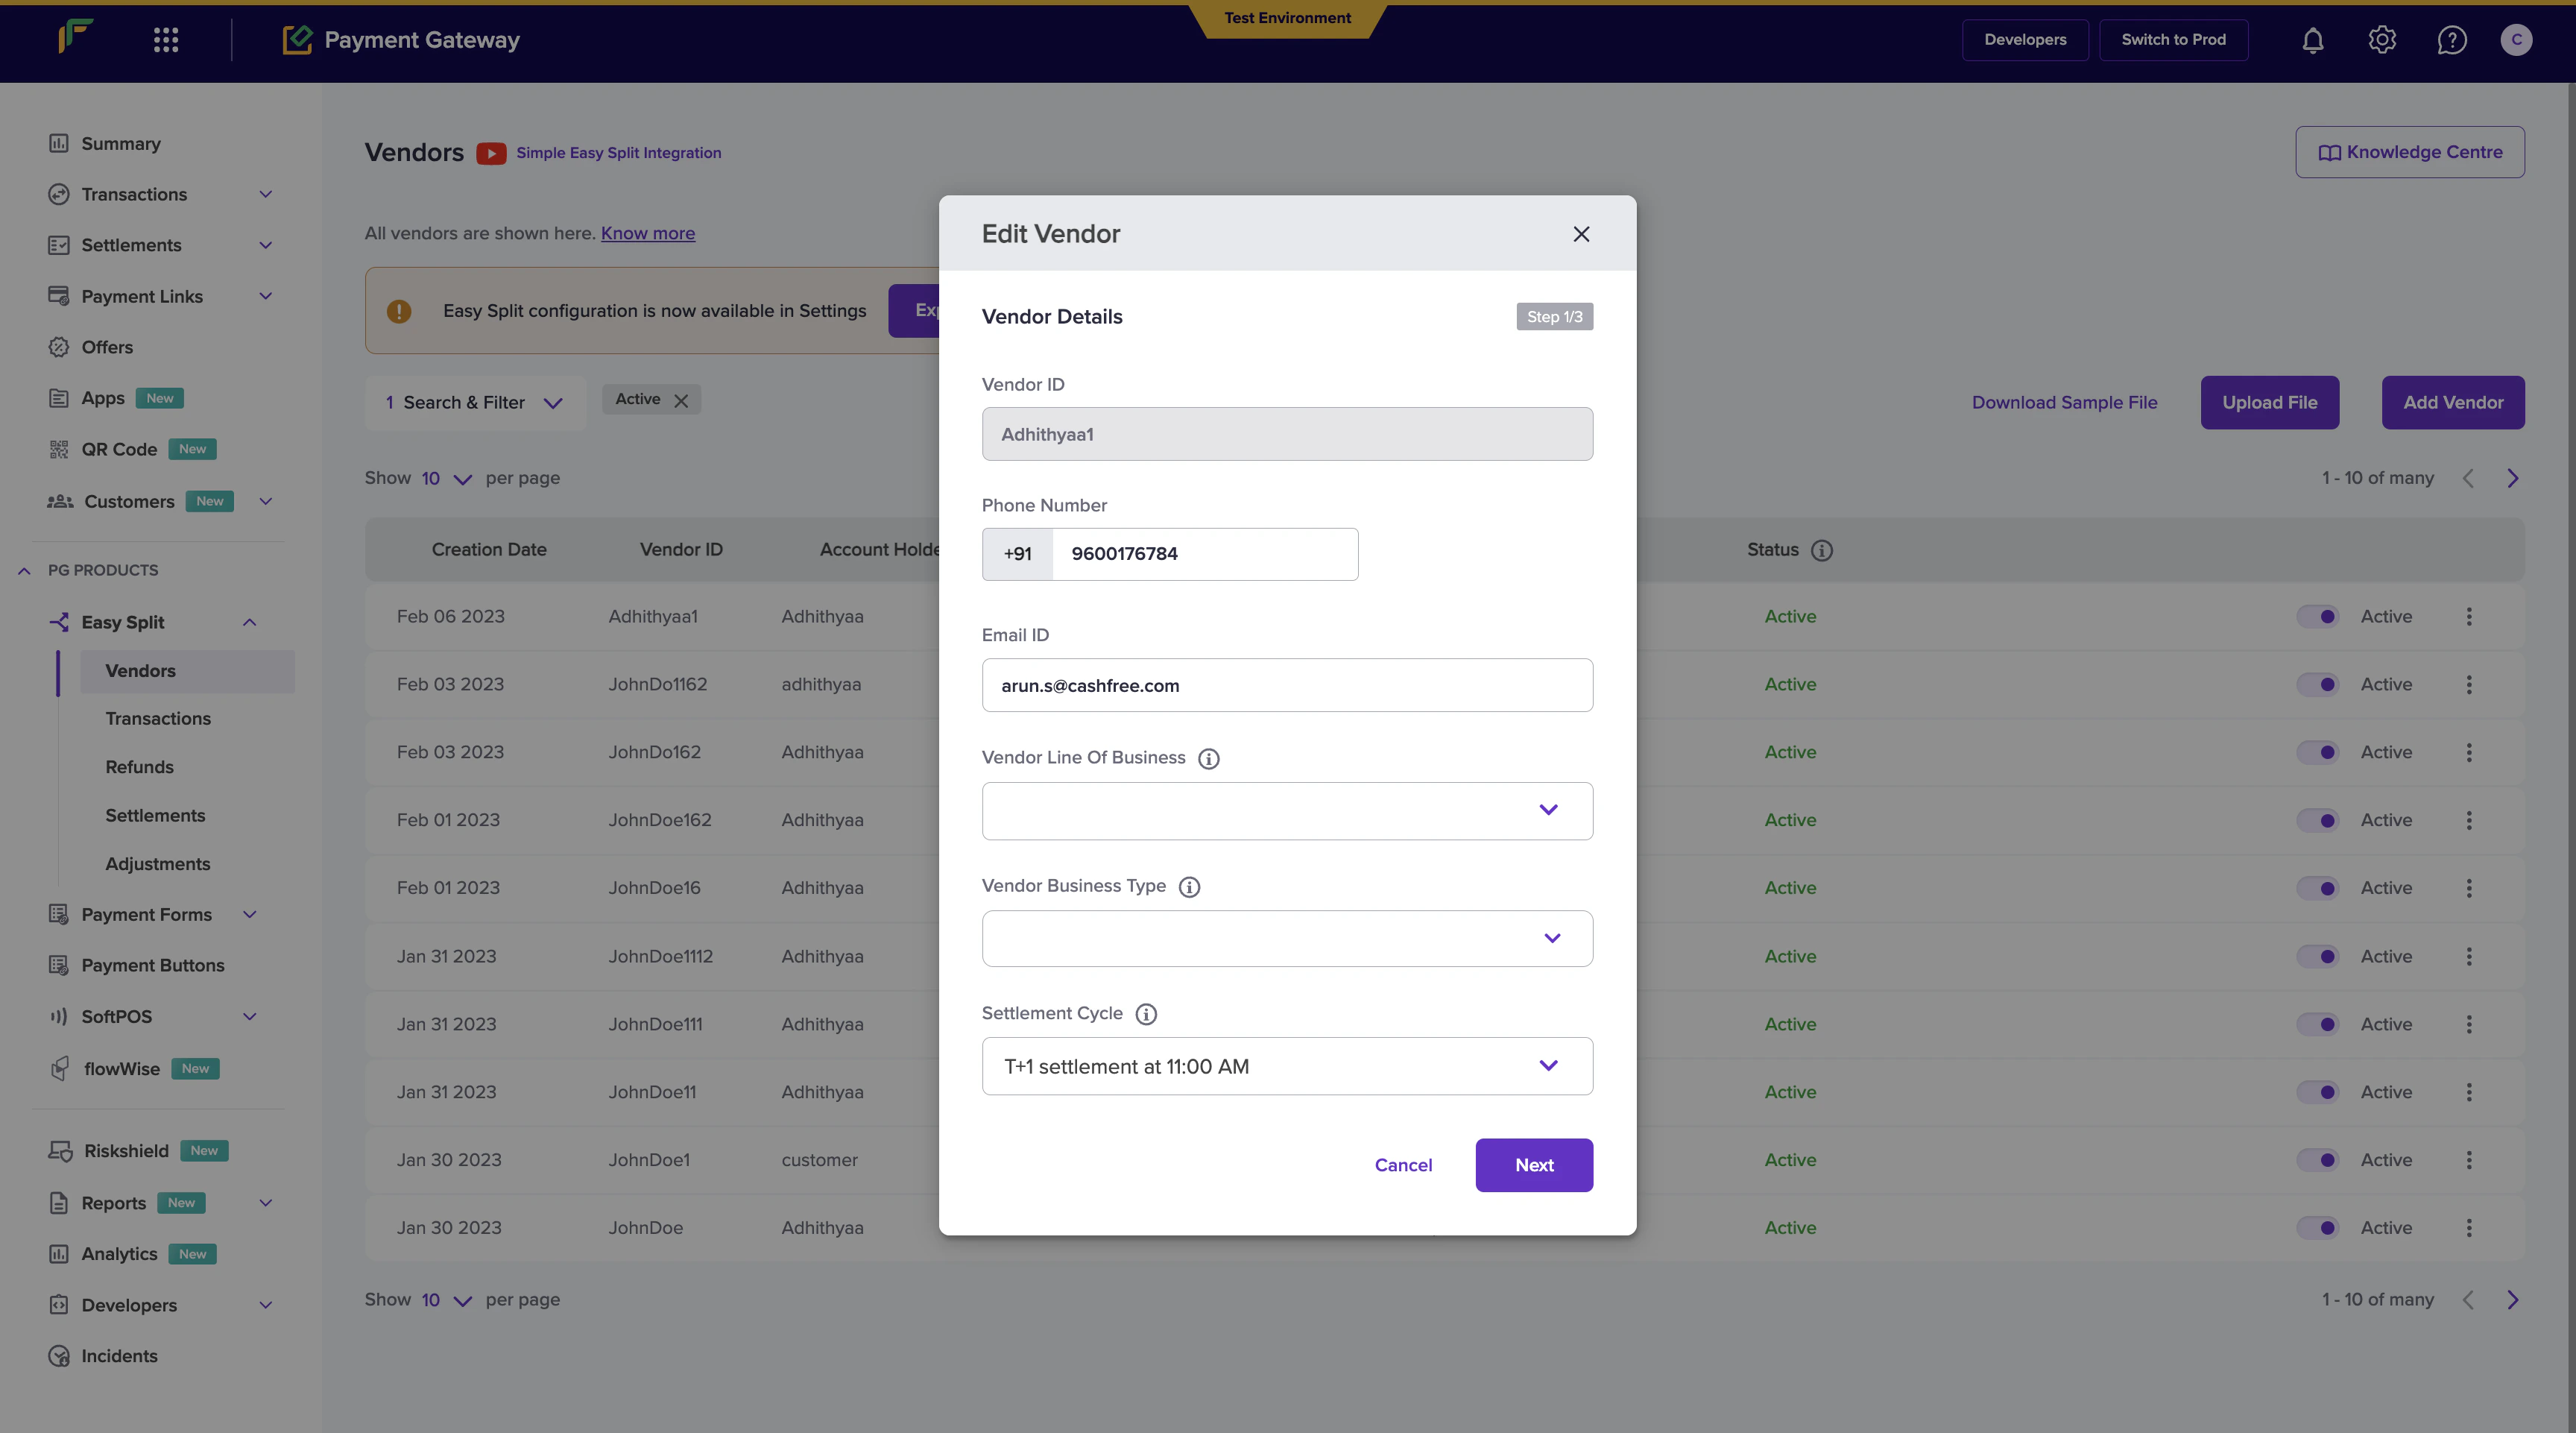
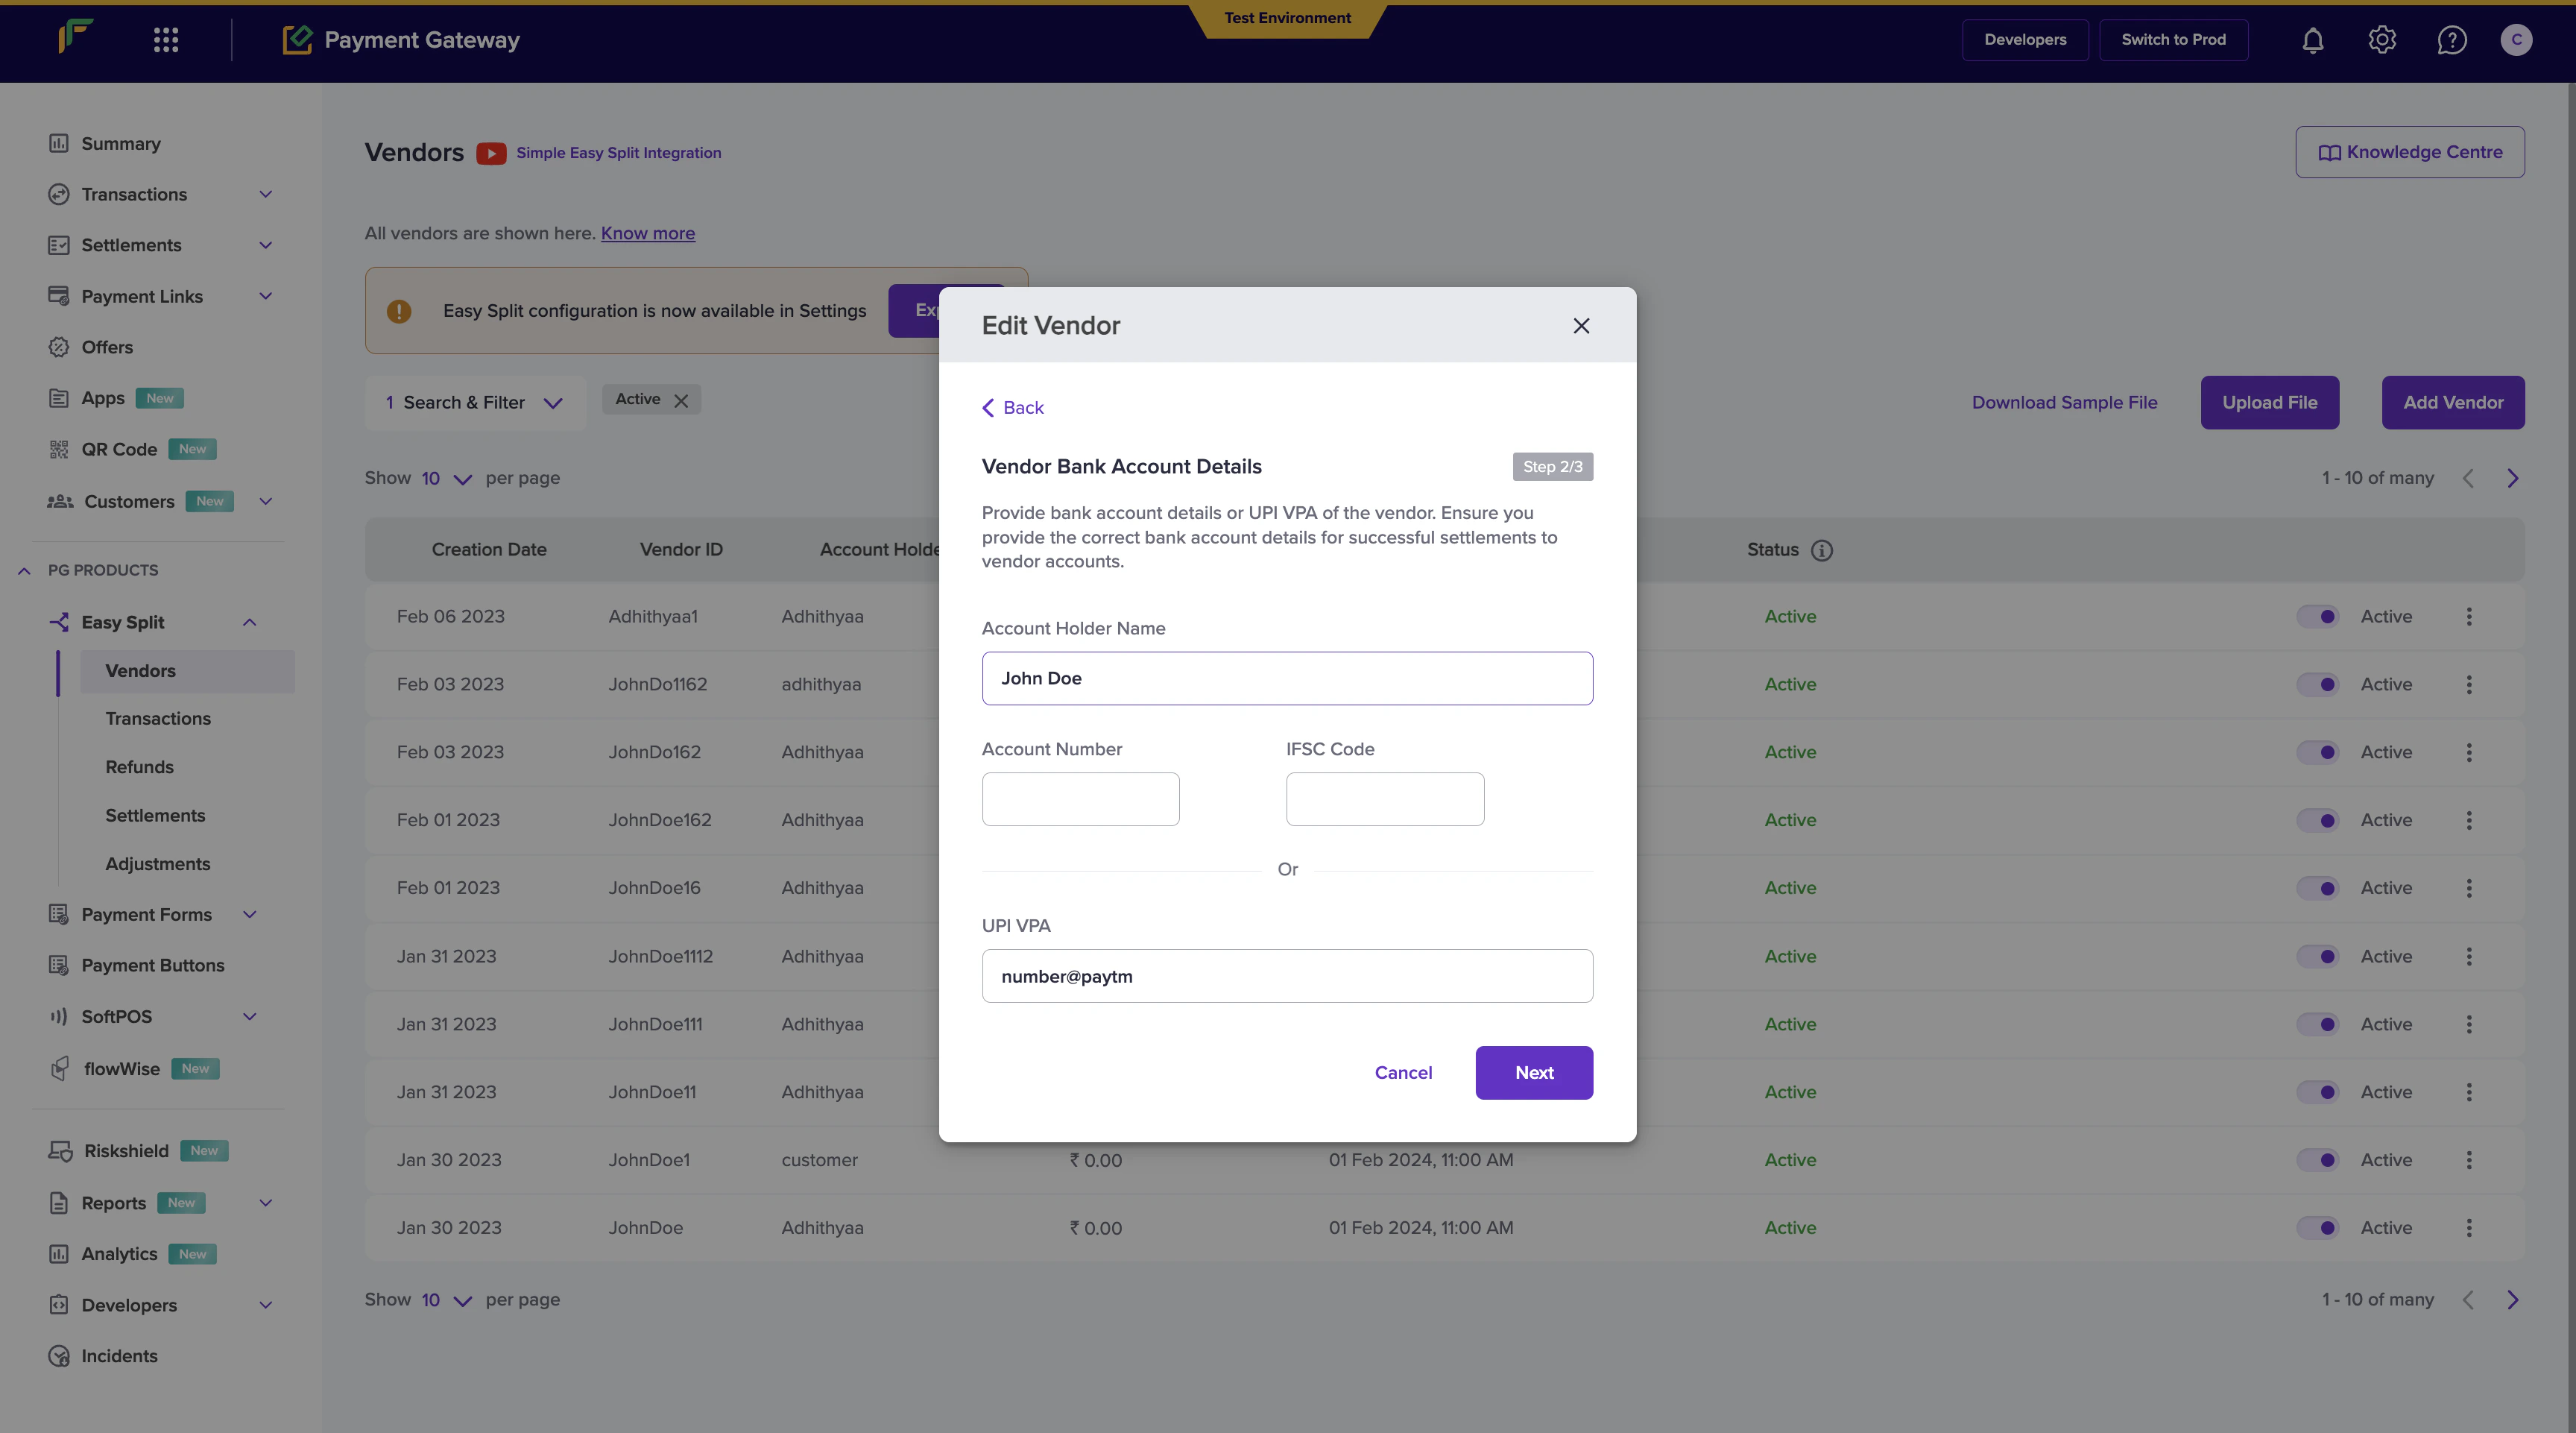
 You can update the following details:
Vendor details:
* Vendor phone number
* Vendor email ID
* Schedule Option
* Dashboard access
Vendor bank account details:
* Account holder name
* Account number
* IFSC code
* UPI VPA
* Verify account details option
KYC details:
* Vendor type
* Business type
* Documents (Based on the vendor type and business type of your vendors)
Once done updating the changes, click on **Update Vendor Details** option to save your changes.
You can update the following details:
Vendor details:
* Vendor phone number
* Vendor email ID
* Schedule Option
* Dashboard access
Vendor bank account details:
* Account holder name
* Account number
* IFSC code
* UPI VPA
* Verify account details option
KYC details:
* Vendor type
* Business type
* Documents (Based on the vendor type and business type of your vendors)
Once done updating the changes, click on **Update Vendor Details** option to save your changes.
 ## Delete Vendor
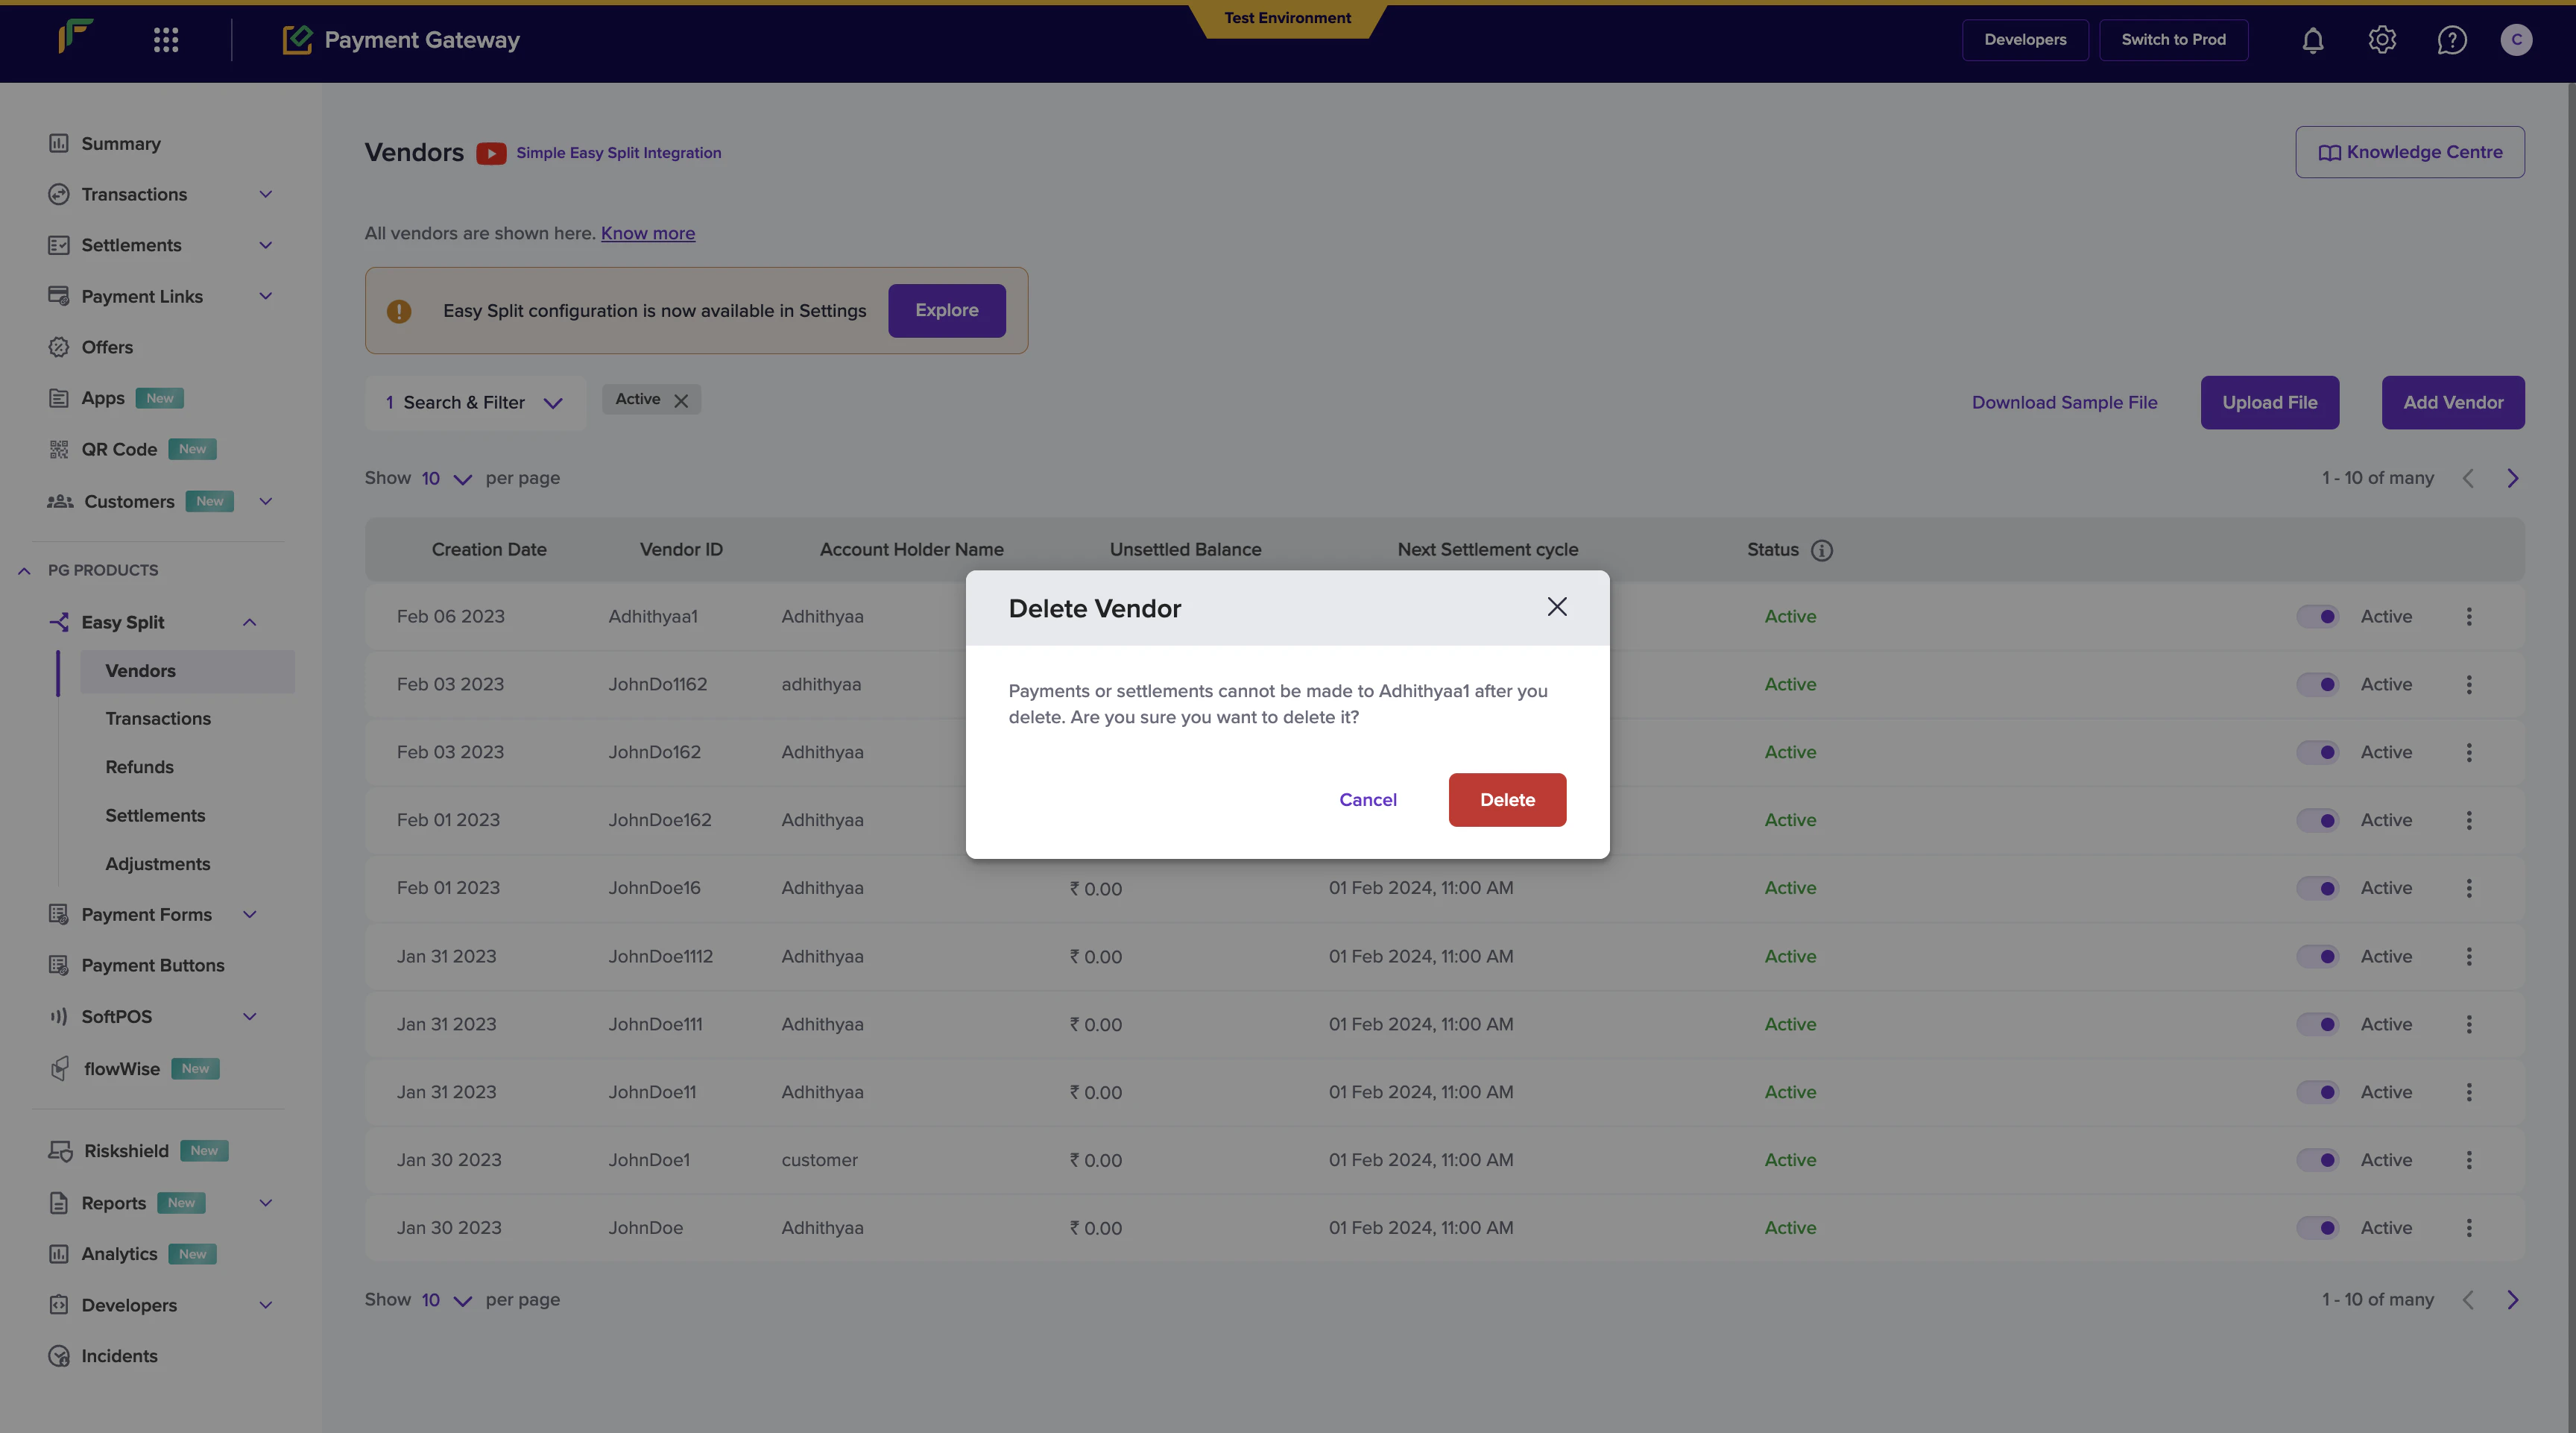
You can delete the added vendors from the dashboard. Click the ellipsis icon on the vendor you want to delete, and select **Delete Vendor**. Click **Delete** in the pop-up window.
## Delete Vendor
You can delete the added vendors from the dashboard. Click the ellipsis icon on the vendor you want to delete, and select **Delete Vendor**. Click **Delete** in the pop-up window.